
1. How to edit or modify Business Name?
You can easily edit or modify your business name using the Boost app by following these steps:
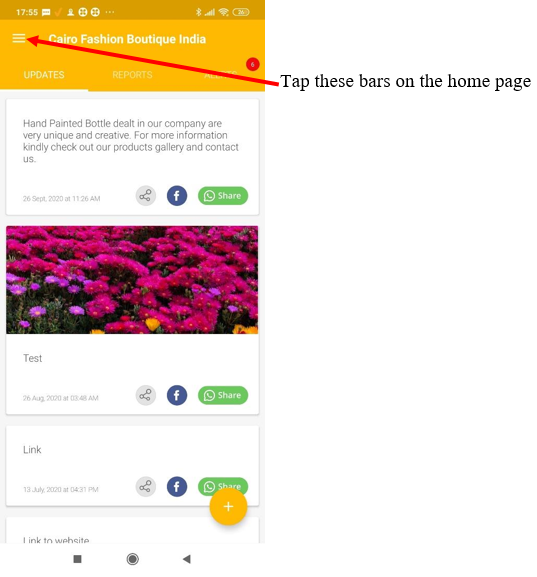
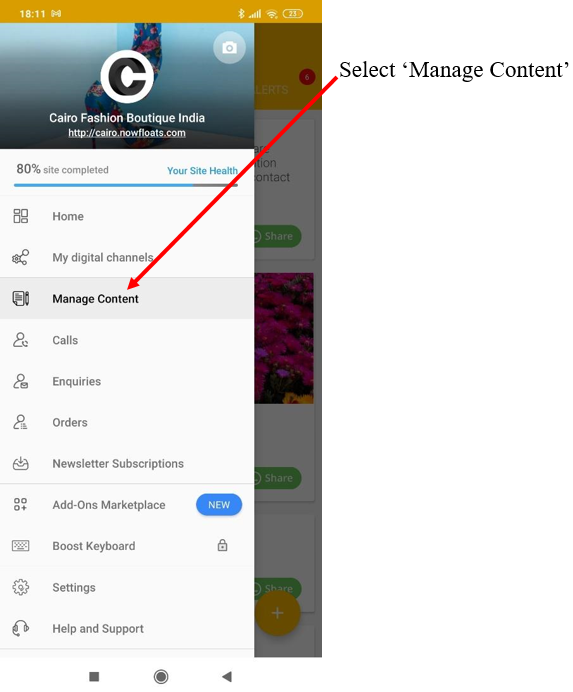
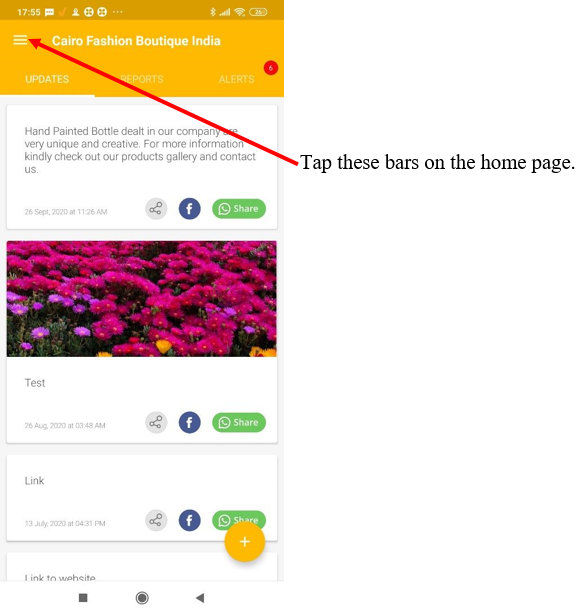
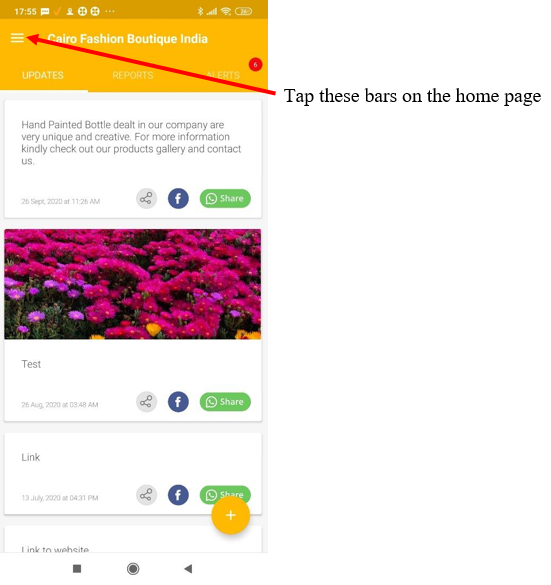
i. Open the app and tap the bars on the top left of the screen.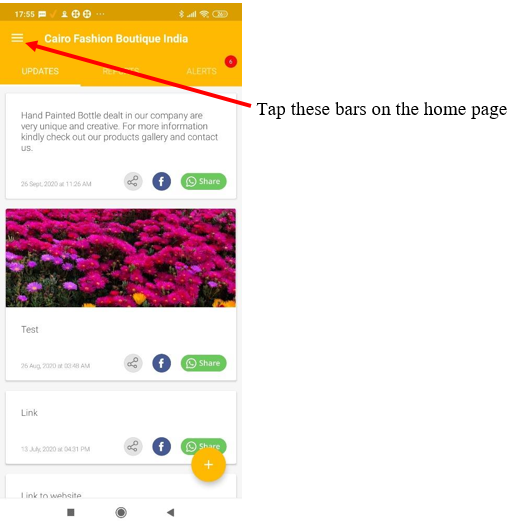
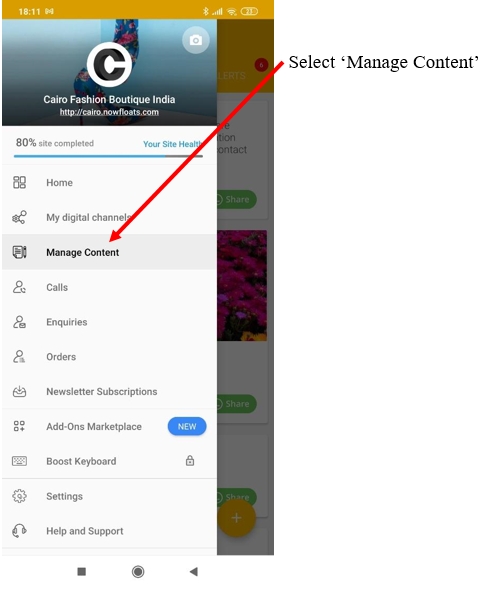
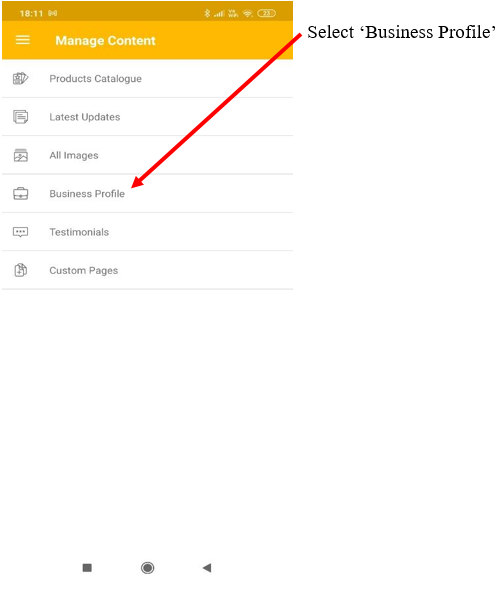
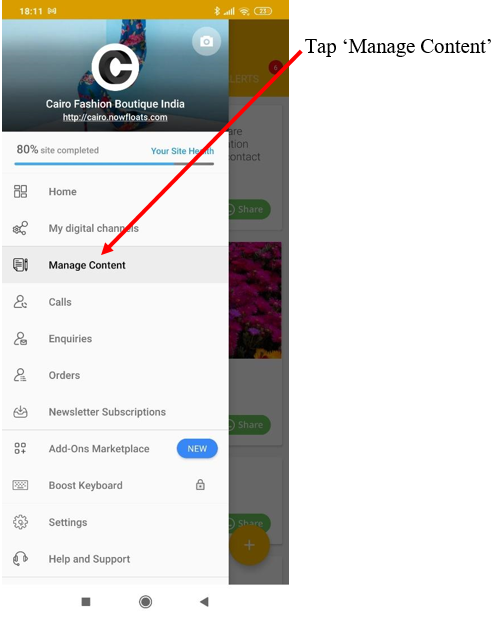
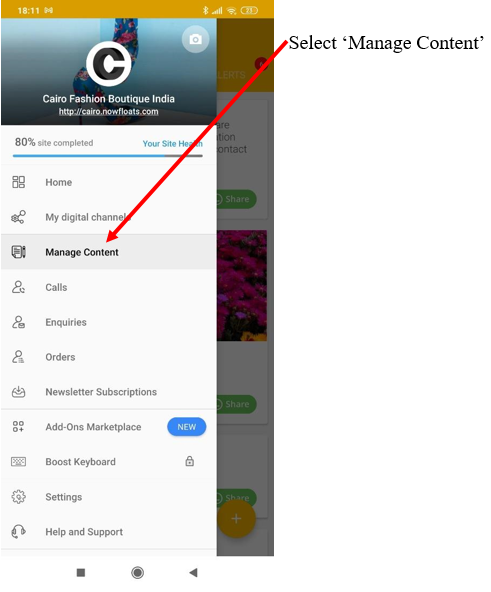
ii. The main menu will appear. Select ‘Manage Content’.
iii. On the next page, select ‘Business Profile’.

iv. Now, select ‘Edit Basic Info’.
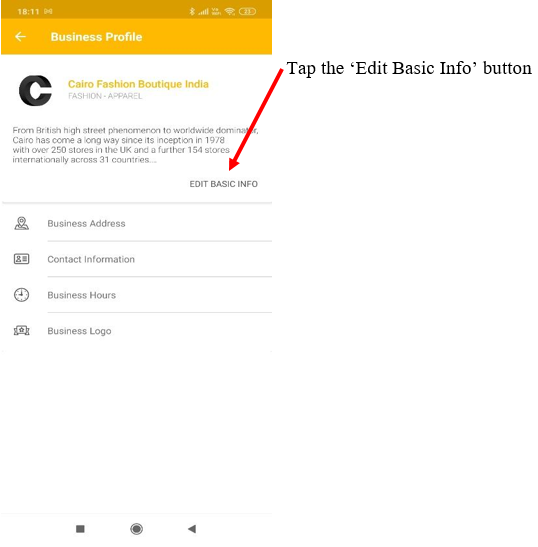
v. On the next page, edit or change business name and click the ‘✔’ mark to save changes.

2. How to change Business Address?
Boost makes it very simple to alter or modify your business address. All you need to do is to follow these steps.
i. Go to the home page and tap the bars on the top left.
ii. The main menu will appear. Select ‘Manage Content’.

iii. On the next page, select ‘Business Profile’.
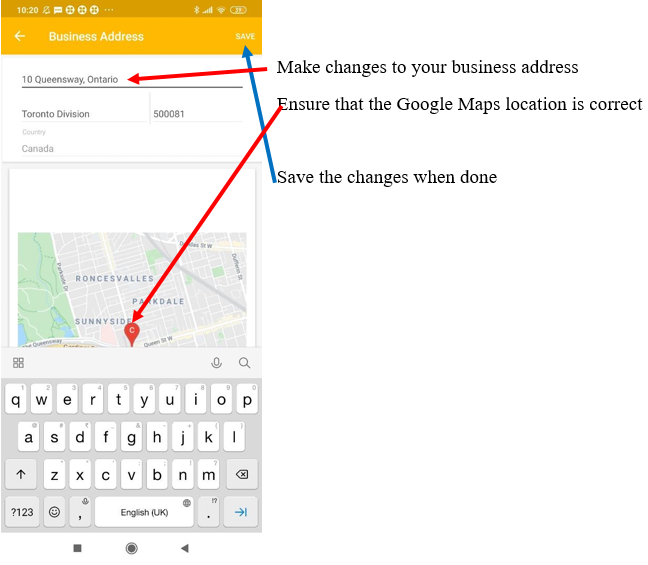
iv. Next, select the ‘Business Address’ option.

v. It will take you to the next page. Make the required changes, ensure that your Google Maps location is correct, and tap the ‘Save’ button to save changes.
3. How to edit Business Phone Number?
Your Business Phone Number or your Display Contact Number is the number that is listed on your website. It is possible to alter or modify your Business Phone Number by following these steps.
i. Open the app and tap the bars on the top left.

ii. The main menu will appear. Select ‘Manage Content’.

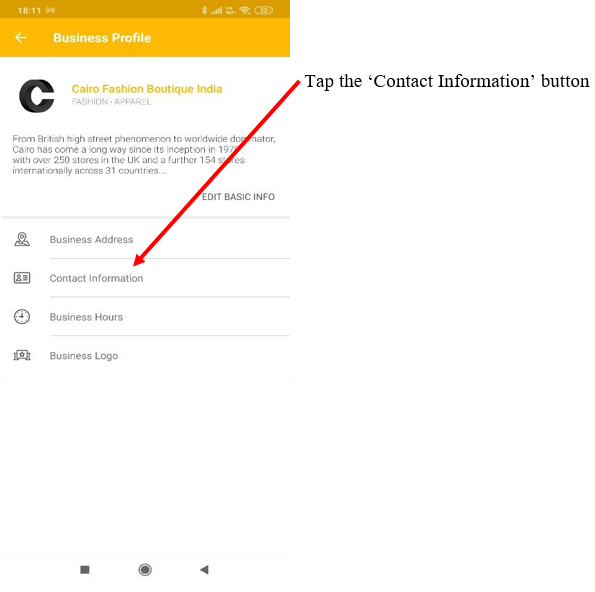
iii. On the next page, select ‘Business Profile’.

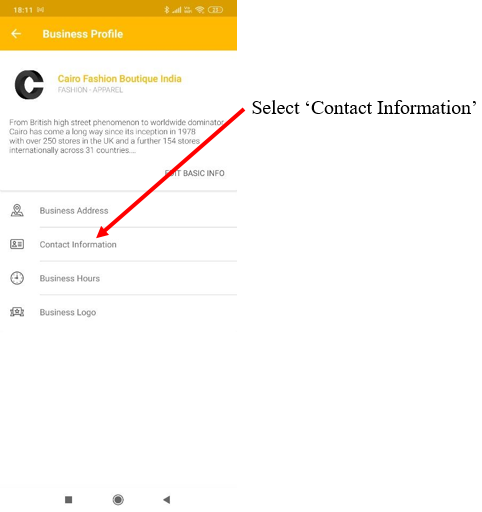
iv. Now, select ‘Contact Information’.
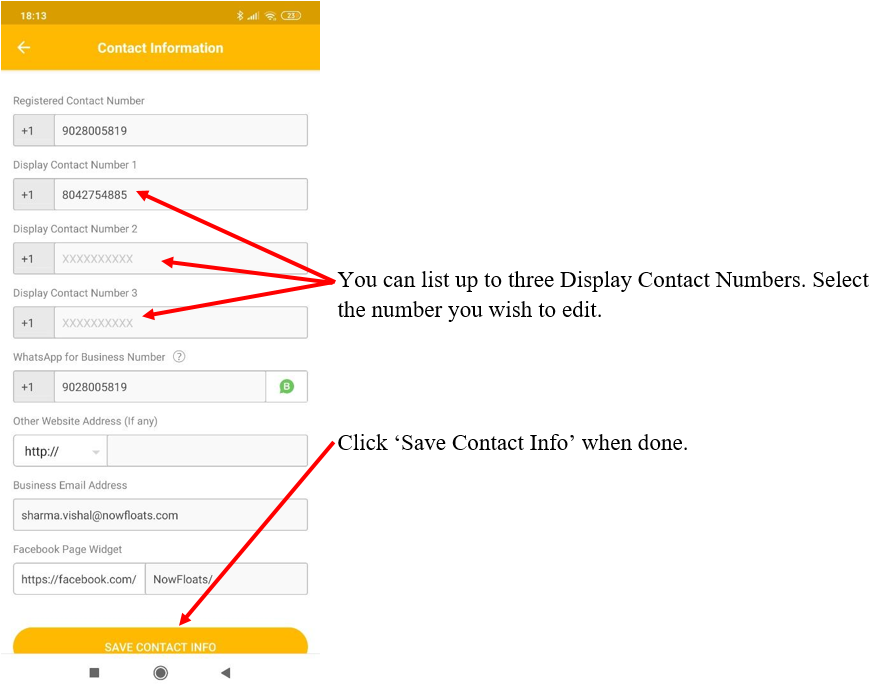
v. On the following page, you will find the Display Contact Number fields. Select the field you wish to change.
4. How to edit Business Hours?
You can easily edit your business hours through the Boost app by following these steps:
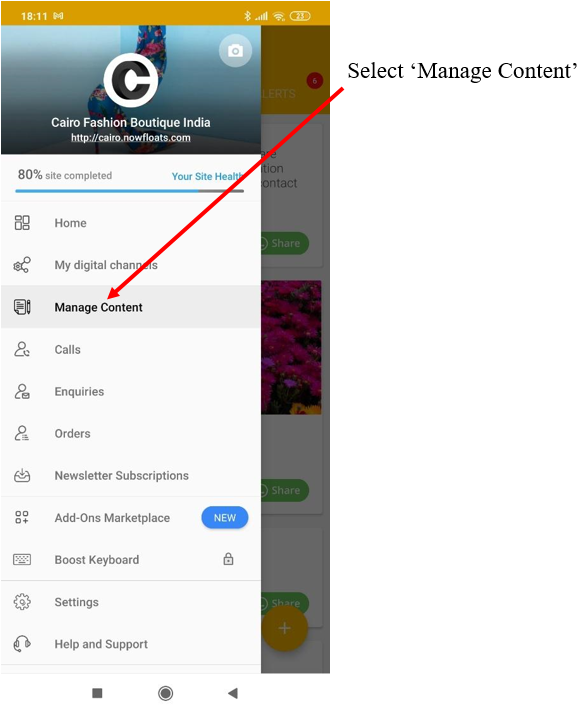
i. Open the app and tap the bars on the top left.

ii. The main menu will appear. Select ‘Manage Content’.
iii. On the next page, select ‘Business Profile’.

iv. Once you reach the ‘Business Profile’ page, select ‘Business Hours’.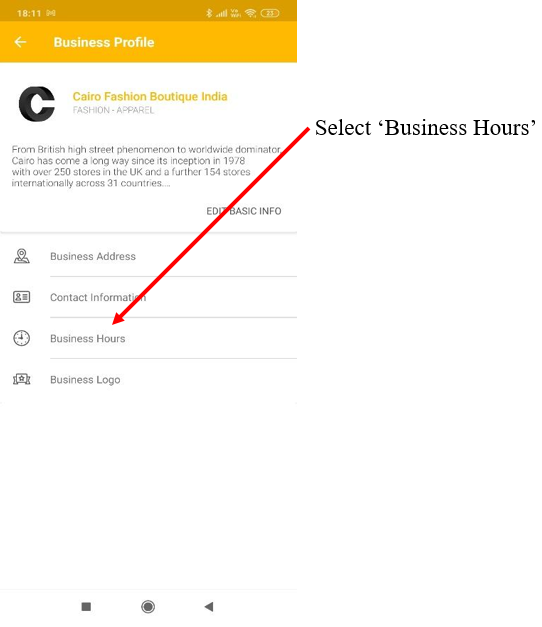
v. Select the field you wish to change by tapping it on your screen.
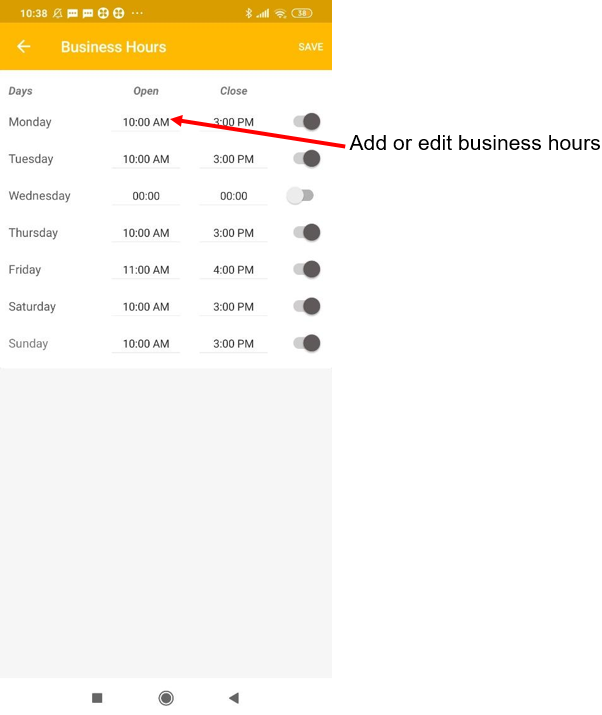
vi. The following window will appear. Make the relevant changes in the box and click ‘Set’ after each change.

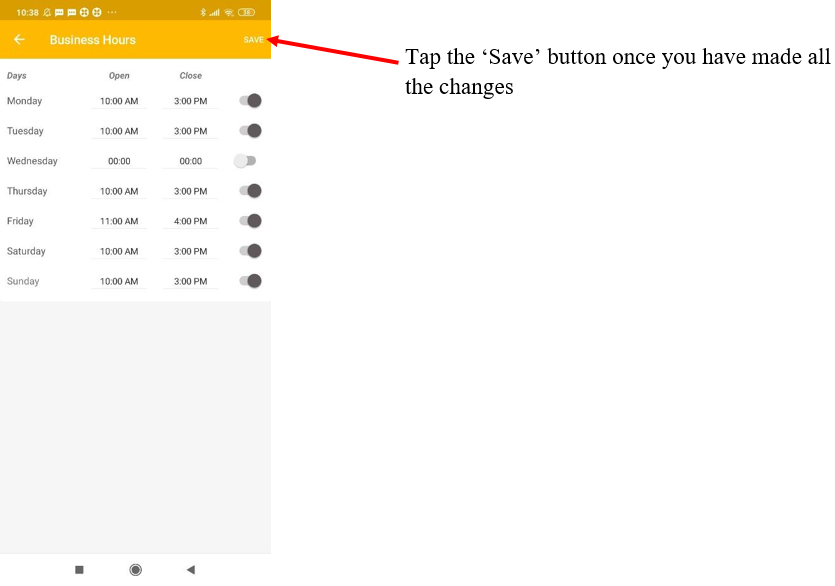
vii. Once you complete all changes, tap the ‘Save’ button to update them on your website.
5. How to add and delete Content Updates.
You can use the ‘Updates’ feature on Boost to stay in touch with your customers. You may publish information on new launches, new collections, best-selling products etc. Follow these directions to add and delete an update.
a) Adding an Update
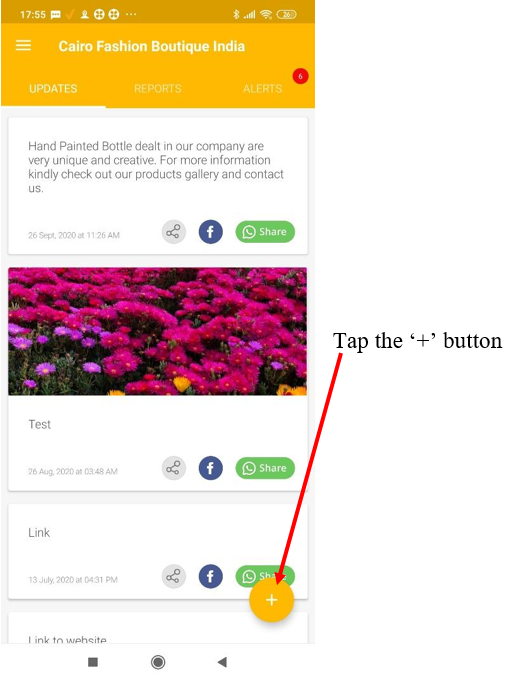
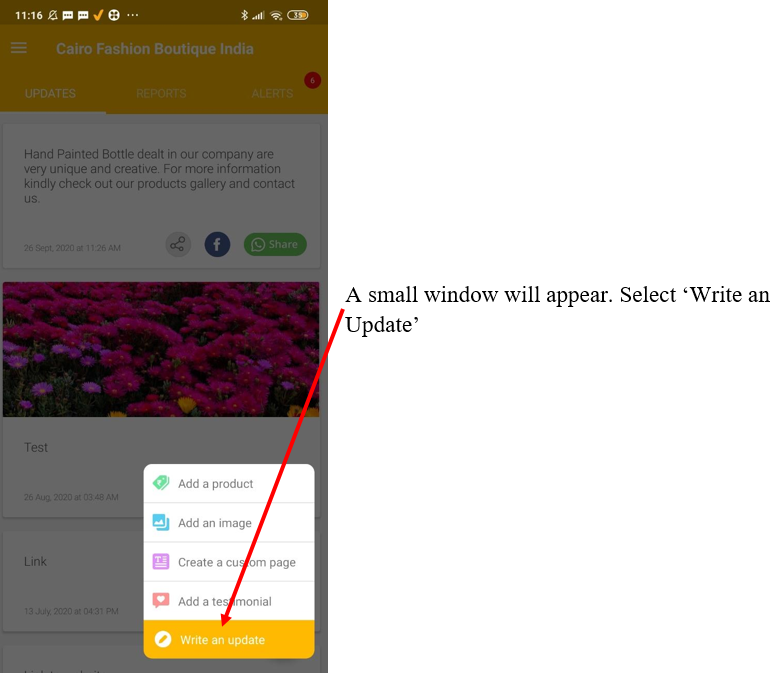
i. Go to the home screen and tap the ‘+’ button. This will open a small window at the bottom of the screen. Select ‘Write an Update’.
ii. You will be taken to the next page. Key in your text and use the camera button to upload an image to accompany your write-up.
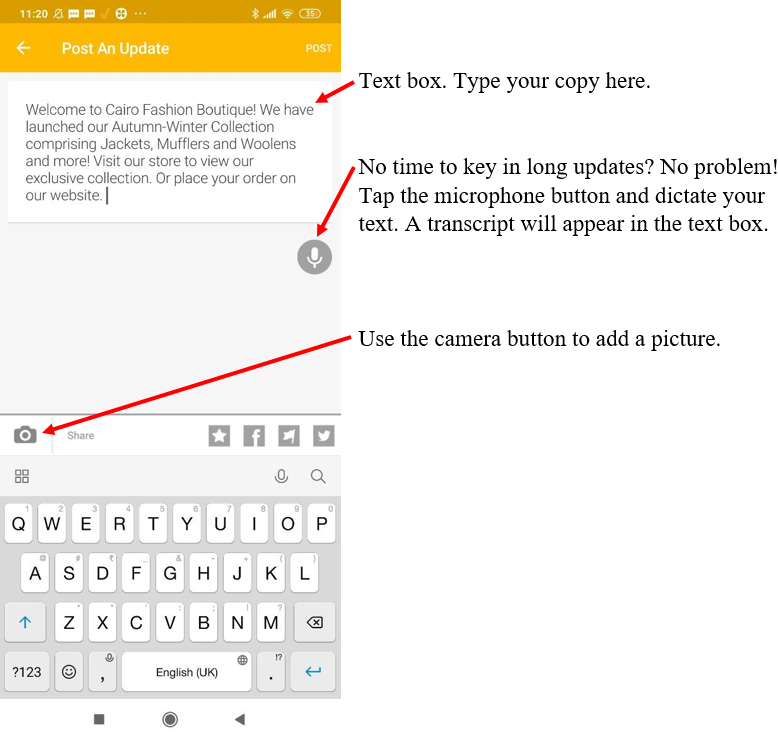
iii. Tap ‘Post’ to publish the content on your website. Use the social media buttons below to share it on various social media channels.

b) Deleting an Update
i. To delete an update, open the home page, ensure that the ‘Updates’ tab has been selected, and tap the item you wish to delete.

ii. Your screen will show the full update. The ‘Delete’ button is on the top right. Tap this button to erase the post.

6. Can I list some products on my Boost website?
Yes. Here is how you can list a new product on your Boost website with the help of the app.
i. Go to the home page and tap the bars on the top left.

ii. The main menu will appear. Select ‘Manage Content’.
iii. You will reach the main content management page. Select ‘Products Catalogue’.

iv. You will arrive on the relevant page. Tap the ‘+’ button to add a product.
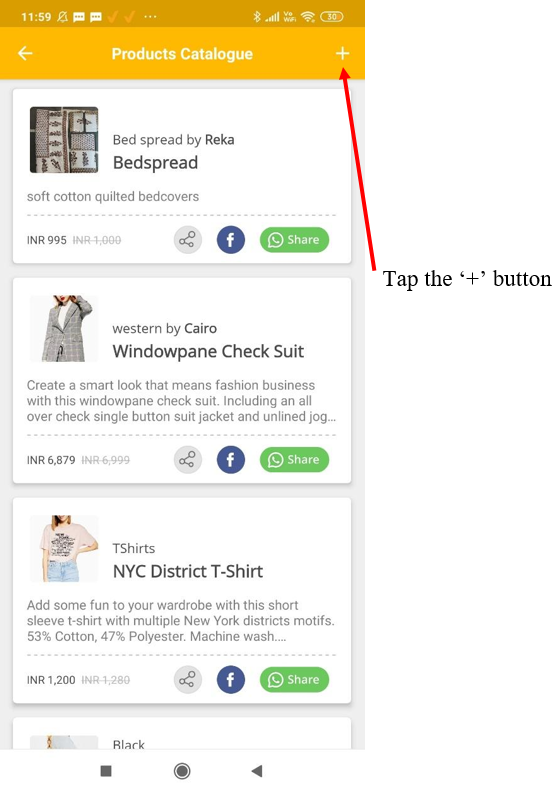
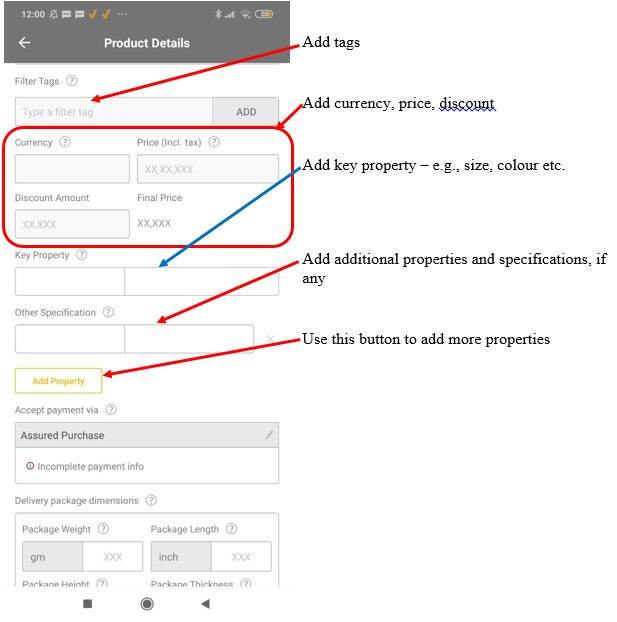
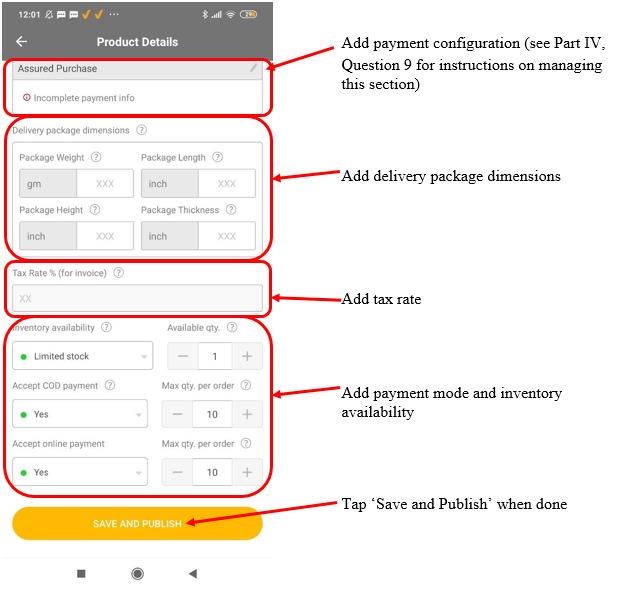
v. It will take you to the ‘Product Details’ page. Fill in the required information as shown below.

10. How to create an effective ‘About’ section (including how to add and edit the section).
The ‘About’ section is the same as the Business Description described in Part II, Question 2 above. It is the face of your online business.
When customers see your shop, they are immediately able to tell what you deal in simply by looking at it. But the same is not possible in an online setup where there is no actual shop.
That is why you must clearly mention what your shop deals in, on your website. Using the ‘About’ section to write about your business is an effective way to tell your online customers about what you sell and persuade them to buy from your shop.
a) Adding the ‘About’ section
i. See Part II, Question 2 above.
b) Editing the ‘About’ section
i. Go to the home page and tap the bars on the top left.

ii. The main menu will appear. Select ‘Manage Content’.

iii. You will reach the main content management page. Select ‘Business Profile’.

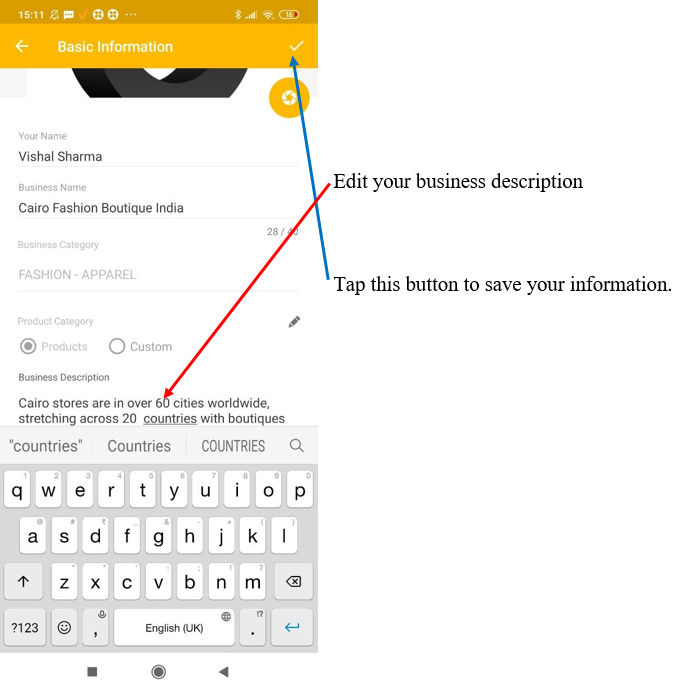
iv. Once you are on the ‘Business Profile’ page, select ‘Edit Basic Info’. Make the necessary changes to the Business Description and tap ‘✔’ to save.
11. How to add/update/delete a Custom Page?
A Custom Page is a blank web page where you can write about anything you want. It could be a blog, it could discuss a specific product, or anything else you wish. The options are endless. What’s more, you can create as many Custom Pages as you like.
Here we’ll tell you how to add, edit, and delete a Custom Page.
a) Adding a Custom Page
i. Go to the home screen and tap the ‘+’ button. This will open a small window at the bottom of the screen as shown below. Select ‘Create A Custom Page’.

ii. Your list of existing Custom Pages will appear. Select the ‘+’ sign to create a new one.

iii. Now you can create a new Custom Page. Key in the content and tap ‘✔’ when done to publish the content on the website.


b) Updating a Custom Page
i. To edit or update a Custom Page, go to the home page and tap the bars on the top left.\

ii. The main menu will appear. Select ‘Manage Content’.
iii. You will see the main content management page. Select ‘Custom Pages’.

iv. The list of existing Custom Pages will appear. Tap the update you wish to update, edit or modify.

v. The full page will appear on the screen. Make the necessary changes directly to the entry and select ‘✔’ when done. The changes will start reflecting on the website immediately.

c) Deleting a Custom Page
i. To delete a Custom Page, go to the home page and tap the bars on the top left of the screen.
ii. The main menu will appear. Select ‘Manage Content’.

iii. You will reach the content management page. Select ‘Custom Pages’.

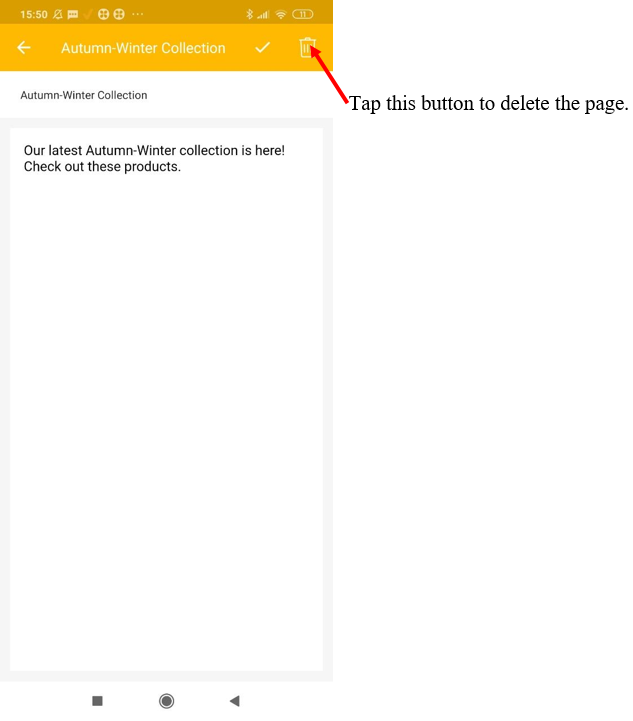
iv. The list of existing Custom Pages will appear. Tap the update you wish to delete.

v. You will see the full page. Tap the ‘Delete’ button to erase the page.
12. How to add or delete a Background Image?
A Background Image helps your website look appealing and sets the mood for your visitors. Follow these instructions to add or delete a background image on your website.
a) Adding a Background Image
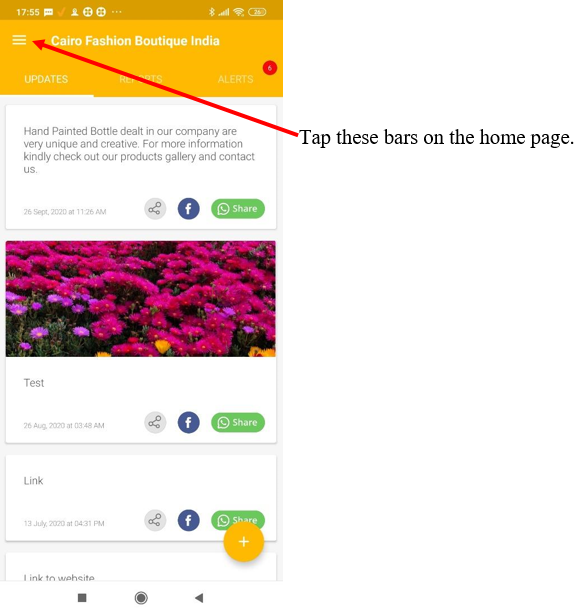
i. Go to the app home page and tap the bars on the top left.

ii. The main menu will appear. Select ‘Manage Content’.

iii. You will come to the main content management page. Select ‘All Images’.

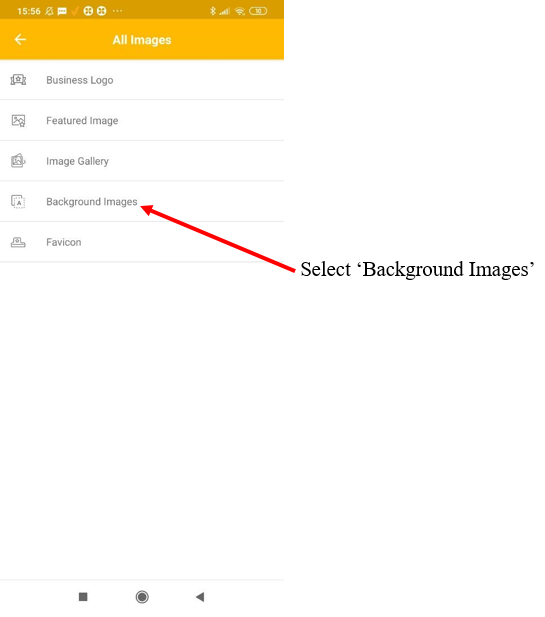
iv. You will be taken to the ‘Images’ page. Select ‘Background Images.’

v. The full list of background images will appear. There is a ‘+’ sign on the top right, tap here to add an image.
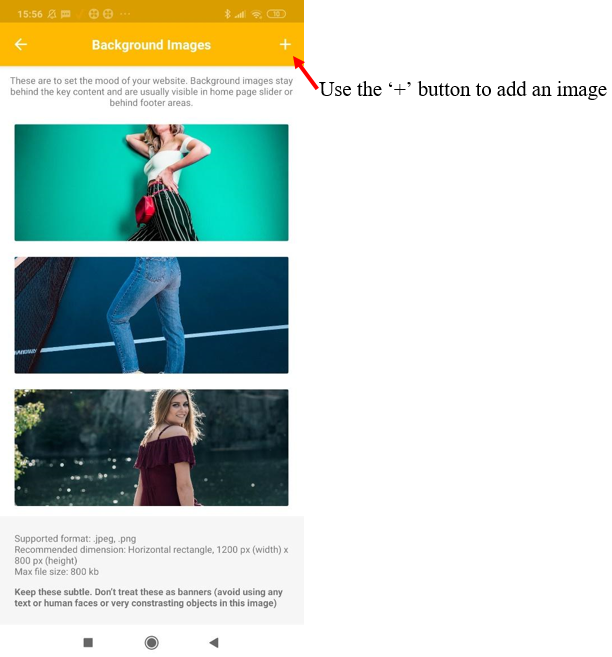
vi. Upon tapping the ‘+’ button, Boost will ask you if you wish to upload the picture using your camera, or from the photo gallery. Select the appropriate option.
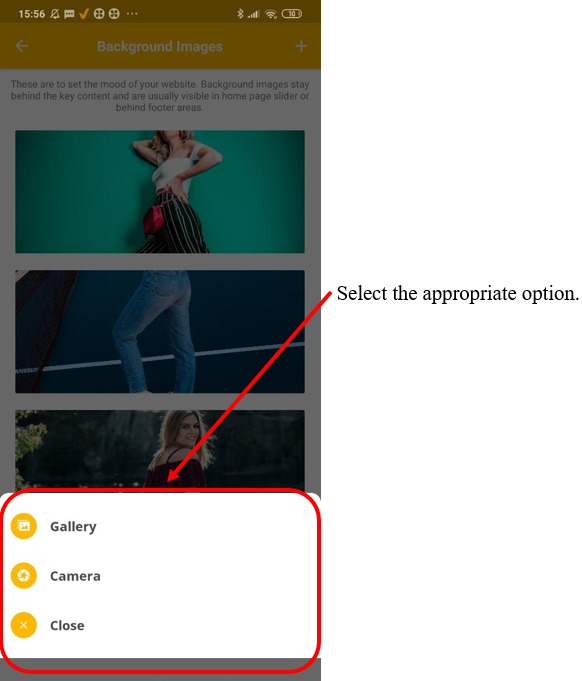
Image Specifications
In order to show up properly on the website, the background image must match certain specifications in terms of size and format. Keep these in mind:
● Shape: Horizontal rectangle
● Resolution: 1200 px (width) x 800 px (height)
● Max file size: 800 KB each
● You can upload a maximum of 8 background images.
b) Deleting a Background Image
i. Go to the home page and tap the bars on the top left.

ii. The main menu will appear. Select ‘Manage Content.’

iii. You will reach the main content management page. Select ‘All Images’.

iv. You will be taken to the ‘All Images’ page. Select ‘Background Images’.
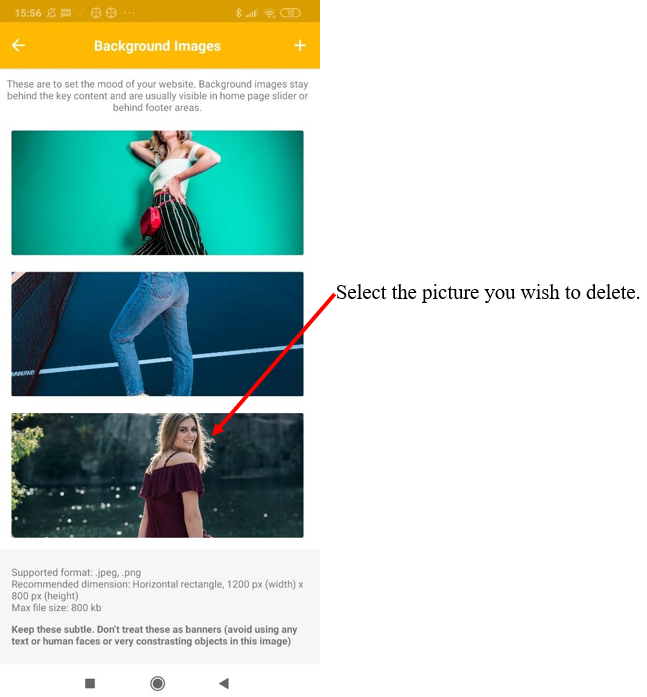
v. The full list of Background Images will appear. Select the one you wish to delete.
vi. You will be taken to the next page. Use the ‘Delete’ button to delete the image.

13. How to change a Featured Image?
A Featured Image is a visual that appears adjacent to the ‘Our Story’ section. Its prime position empowers it to play a key role in your branding. Here we will explain how you can change a Featured Image.
i. Go to the app home page and tap the bars on the top left.
ii. The full menu will appear. Select ‘Manage Content’.

iii. You will reach the main content management page. Select ‘All Images’.

iv. You will reach the ‘All Images’ page. Select ‘Featured Image’.

v. Once you are on the Featured Image page, tap the ‘Change’ button.
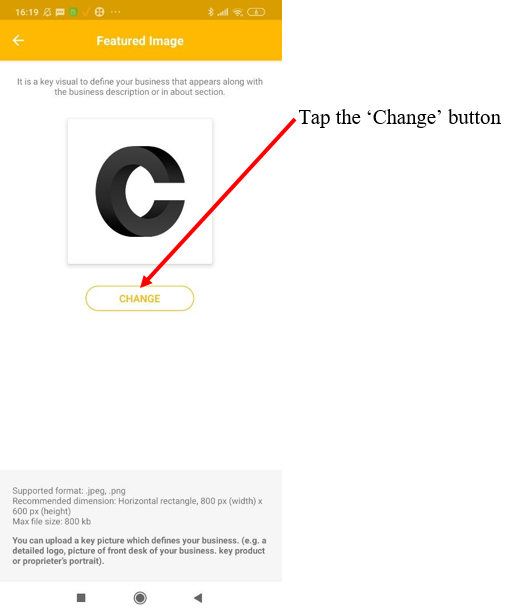
vi. Boost will ask you whether you wish to use your camera, or choose a picture from the gallery. Select the appropriate option and swap the Featured Image.

Image Specifications
A Featured Image must meet the required specifications to appear properly on the page:
● Supported format: .jpeg, .png
● Recommended shape: Horizontal rectangle
● Resolution: 800 px (width) x 600 px (height)
● Max file size: 800 KB
14. How to add a video of your shop.
By adding videos, you can make your site more engaging and attract more visitors. It can also help you with social media marketing by allowing you to share the links or pages on your social media handles. Follow these steps.
i. Log in to the web portal. Go to the Dashboard and click on ‘Custom Pages’ under the ‘Manage Content’ tab.
ii. You will see the following page.
iii. You will reach the next page. Enter the page name, click on insert video, paste the video URL to add a video of your clinic.
iv. Once you have inserted the link, scroll down and click the ‘Create’ button to publish the page.
Click the ‘Create’ button to publish the page.
15. How to sync your social media pages with your Boost account?
One of the biggest advantages of Boost is that it enables you to post your content on social media automatically, saving time and effort. Follow these steps to sync your Facebook account with the Boost platform.
i. Go to the app home page and tap the bars on the top left.

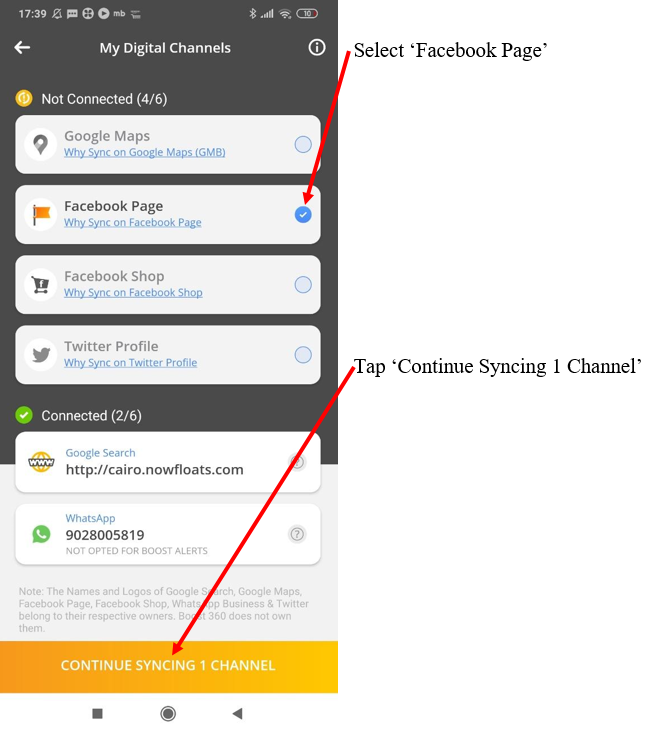
ii. The main menu will appear. Tap ‘My Digital Channels’.

iii. This will take you to the relevant page. All digital channels which are not connected will appear under the ‘Not Connected’ column. Select ‘Facebook Page’, then tap ‘Continue Syncing 1 Channel’ as shown below.
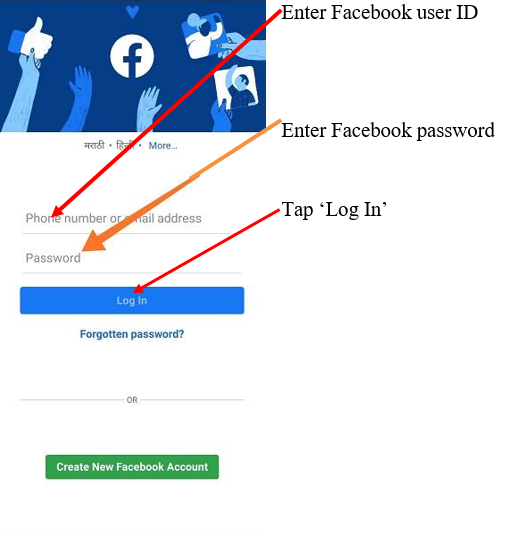
iv. Boost will ask you if your business already has a Facebook page. Tap ‘Connect My Facebook Page’ if the answer is Yes and ‘Skip’ if the answer is No. Note that selecting ‘Skip’ will prevent you from proceeding further by bringing you back to the previous page. Hence, it is essential to ensure that you have an active Facebook business page to proceed with this action.

v. Once you have selected ‘Connect My Facebook Page’, Boost will ask you for your login details.
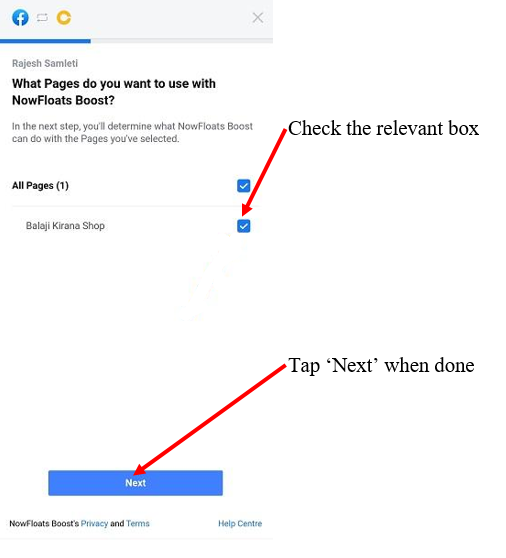
vi. Next, Boost will want to know which pages you wish to connect with the app. Check the relevant box as shown below.
vii. You will also have to give Boost permission to manage your Facebook page as shown below.

viii. The following message will be displayed upon clicking ‘Done’. Tap the ‘OK’ button.

ix. Once all the steps are complete, you will see the following message indicating success. Tap ‘Go to Digital Channels’ to go back to the main page.

16. How to enable WhatsApp chat widget on your Boost website?
Boost enables you to communicate with your customers through WhatsApp to keep them informed. Here is how to you can enable the WhatsApp chat widget to add another communication channel to your business. Follow these steps.
i. Go to the home page and tap the bars on the top left.
ii. The main menu will appear. Select ‘Manage Content’.
iii. You will reach the main content management page. Select ‘Business Profile’.

iv. Once you are on the ‘Business Profile’ page, select ‘Contact Information’.
v. Once you are on the page, add your WhatsApp number and tap ‘Save Contact Info’.

17. How to add and delete images in the Picture Gallery?
Boost allows you to upload as many images as you want to your Picture Gallery. Follow these tips to add and delete pictures using the app.
a) Adding an image to the Picture Gallery
i. Go to the home screen and tap the ‘+’ button. This will open a small window at the bottom of the screen as shown below. Select ‘Add an Image’.

ii. You will see all the existing pictures on the page. Use the ‘+’ button to upload a new image.

iii. Once you tap the ‘+’ button, Boost will ask if you wish to use your camera, or get the picture from your smart phone’s picture gallery. Select the appropriate option to complete your upload.
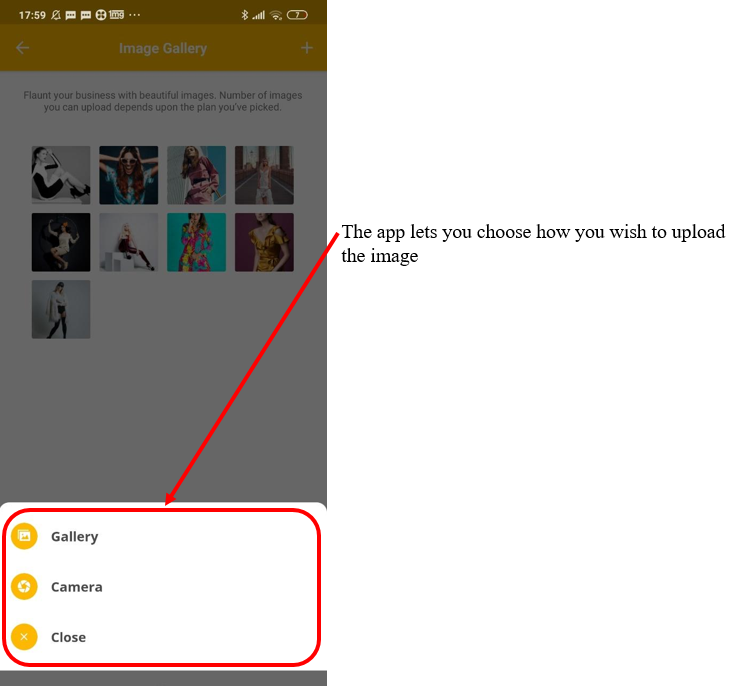

Image Specifications
It is important to follow the right image specifications for it to display correctly. Keep these conditions in mind while uploading an image to the Picture Gallery.
● Supported format: .jpeg, .png
● Shape: Horizontal rectangle
● Resolution: 1200 px (width) x 800 px (height)
● Max file size: 800 KB
b) Deleting an image from the Picture Gallery
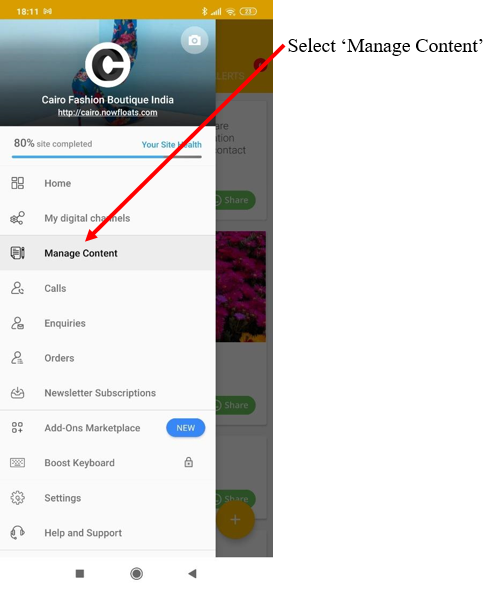
i. Go to the home page and tap the bars on the top left.

ii. The main menu will appear. Select ‘Manage Content’.

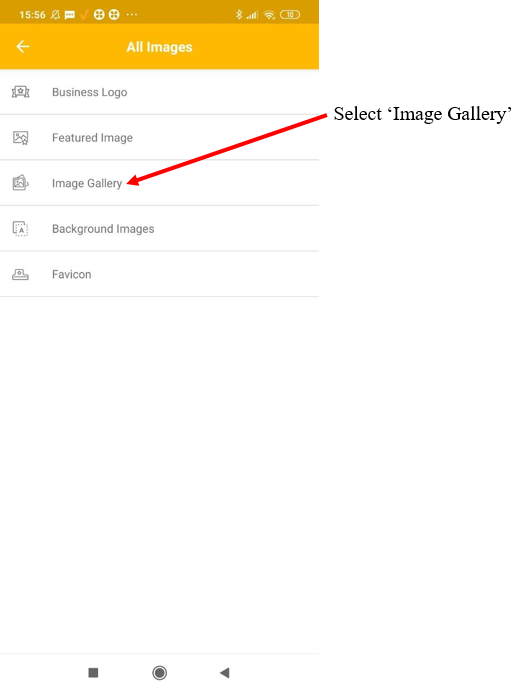
iii. You will reach the main content management page. Select ‘All Images’.

iv. You will be taken to the main Images page. Select ‘Image Gallery’.
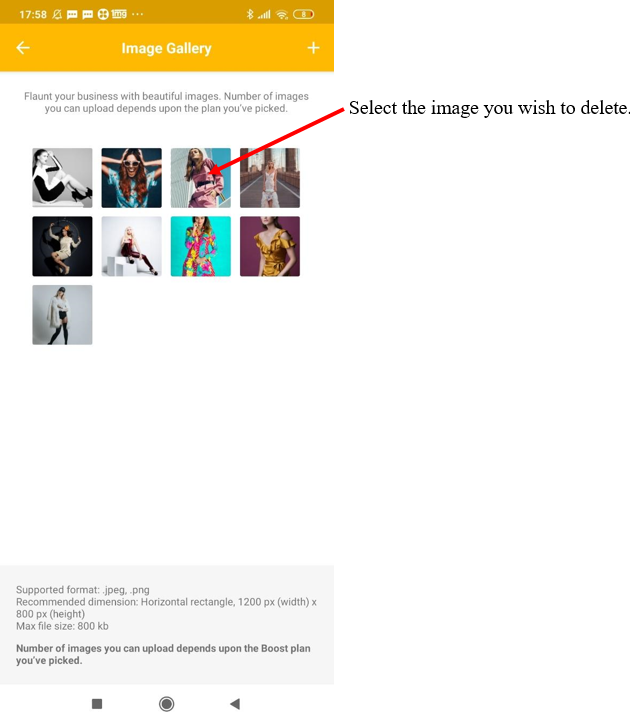
v. All the existing images in the Gallery will be visible on the page. Select the image you wish to delete.
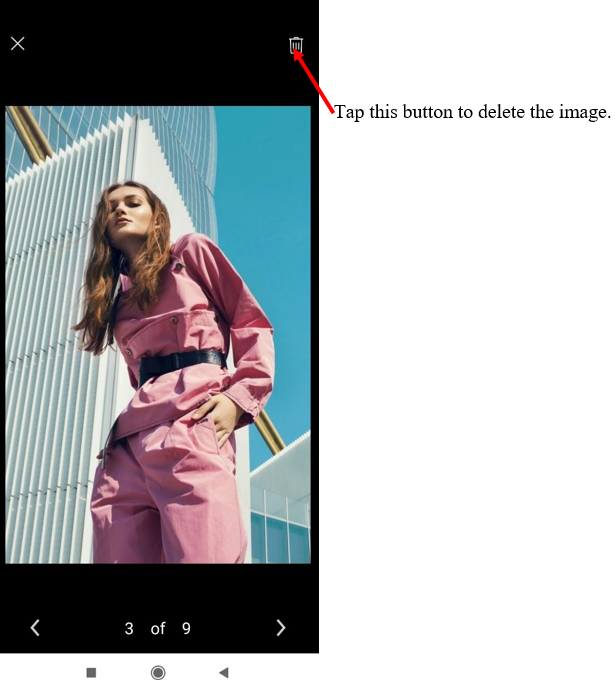
vi. The image will open on the next page. Tap the ‘Delete’ button to delete the image.
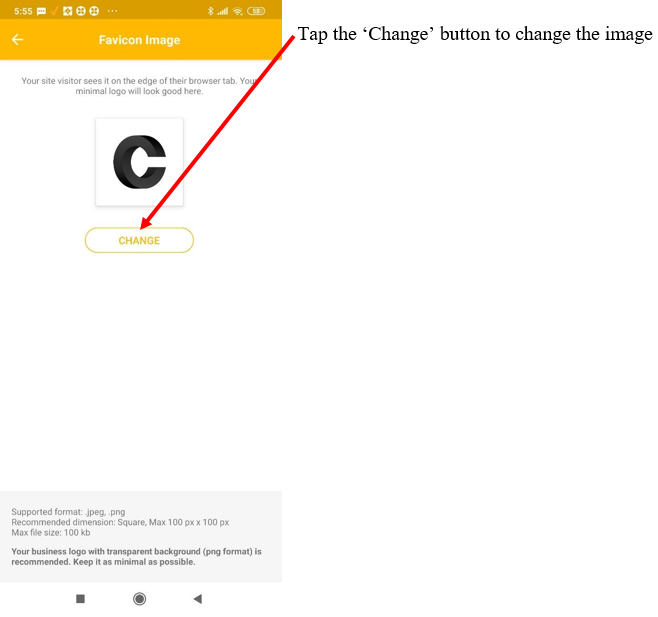
18. How to change a Favicon image?
A Favicon image is a picture that appears next to the web page address on the browser tab, making it easier for users to identify your website. Here we’ll tell you how to add or change a Favicon image.
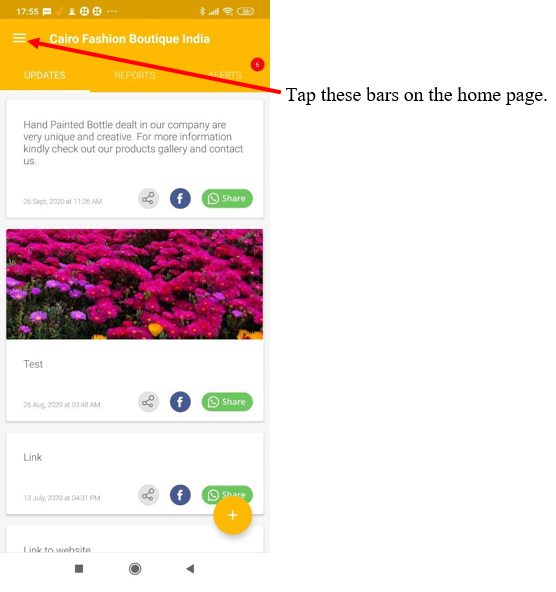
i. Go to the home page and tap the bars on the top left.

ii. The full menu will appear. Select ‘Manage Content’.

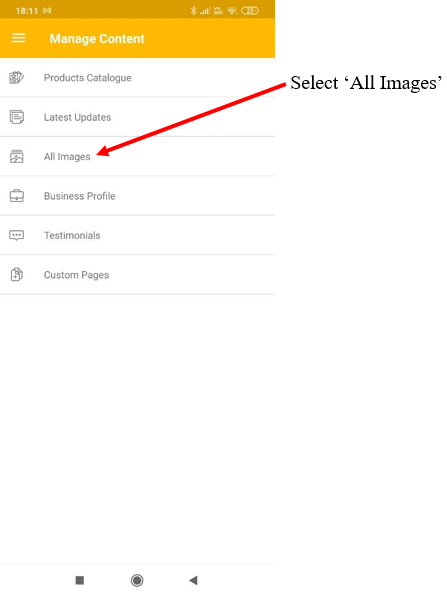
iii. You will reach the main content management page. Select ‘All Images’.
iv. You will be taken to the ‘All Images’ page. Select ‘Favicon’.

v. On the Favicon page, tap the ‘Change’ button.
vi. Boost will ask you whether you want to use the camera to add the new picture, or select an image from your smart phone’s picture gallery. Make the appropriate choice to complete the process.
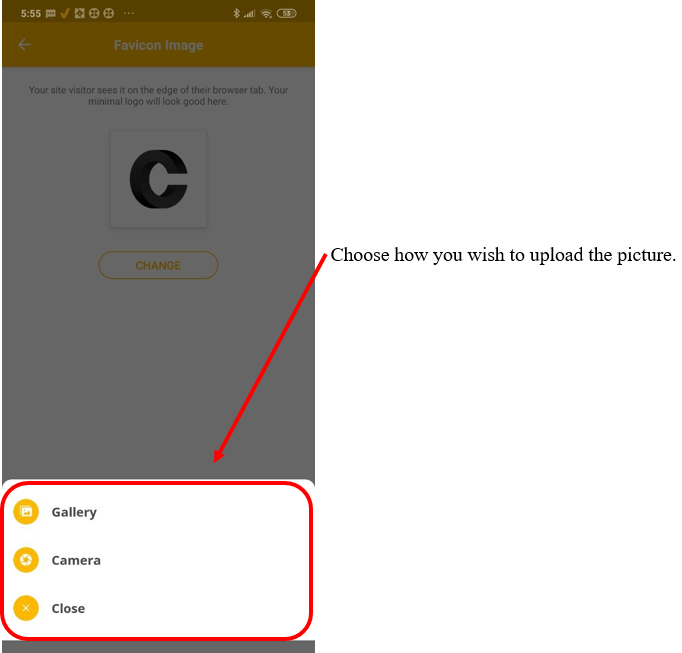
Image Specifications
It is important to ensure that the image specifications are followed so that your Favicon image is properly displayed.
● Supported format: .jpeg, .png
● Shape: Square
● Resolution: Max 100 px X 100 px
● Max file size: 100 KB
● Note: A transparent background (.png format) is recommended. Keep image as minimal as possible.
19. How to change your Business Logo?
Your shop’s logo is one of the most important branding elements for your business. Here we’ll explain how you can add or change your business logo using the app.
i. Go to the home page and tap the bars on the top left.
ii. The full menu will appear. Select ‘Manage Content’.

iii. You will reach the main content management page. Select ‘All Images’.
iv. You will reach the ‘All Images’ page. Select ‘Business Logo’.

vi. Boost will ask you whether you wish to upload the new logo from your smart phone’s picture gallery, or use the camera to take a picture. Select the appropriate option to complete the process.


Image Specifications
In order to be displayed clearly, your business logo must meet the required specifications as mentioned below:
● Supported format: .jpeg, .png, .gif
● Shape: Square
● Resolution: 400 px X 400 px
● Max file size: 500 KB
● Note: A white or transparent background (in png) is recommended. For bigger display, remove all padding from the main object in your logo.
20. How to activate content sync across multiple digital channels?
You can link your social media handles to your Boost account to share feed automatically on your social channels. Refer to Part III, Question 16 for detailed instructions on how this can be done.
21. How to add/edit your GST number?
You can easily add your GST number to the platform to facilitate taxation and accounting for your business.
a) Adding GST Number
Before generating the customer invoice, our concerned department will reach out to you for your GST number.
b) Editing GST Number
If there are any changes to be made in your invoice GST number, you can raise a request to opsdesk@nowfloats.com to make the necessary changes.
Comments
0 comments
Please sign in to leave a comment.